
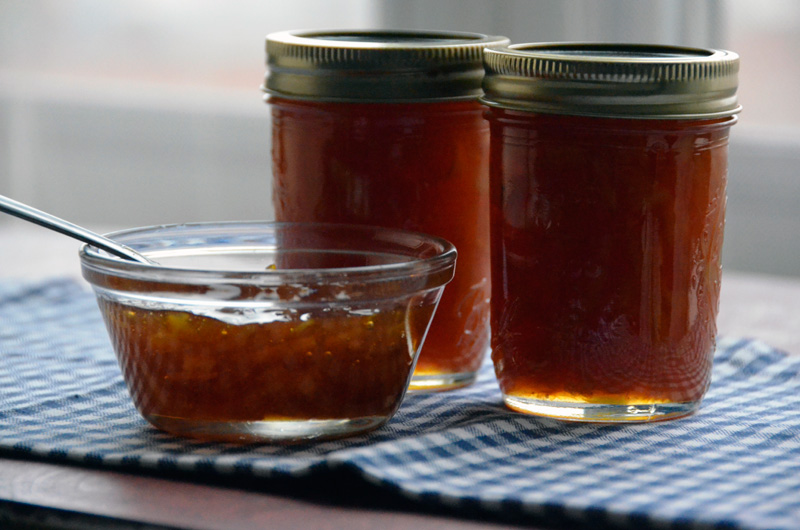
Blood oranges marmalade
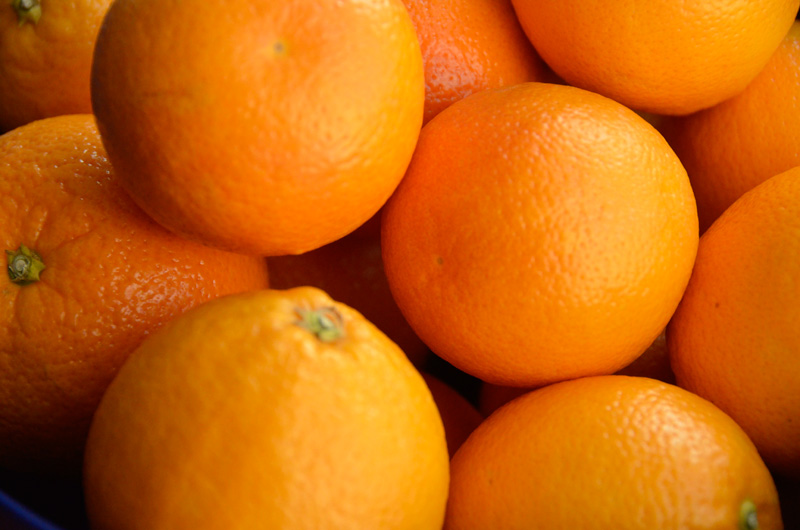
During Fall you can find the most amazing and delicious variety of citrus and one of our favorites is blood oranges and Cara Cara. After watching the documentary Happiness is on the plate, and the episode about the chef David Kinch and his girlfriend Chez Pin, we decided to make some marmalade for the Winter, and save some of the flavors and aromas of these wonderful fruits.
After researching some recipes online, we decided to try two, one from Alton Brown and another from Elise Bauer. The results were perfect and the flavor and aroma just wonderful. Happy canning!

Orange Marmalade by Alton Brown
Ingredients
- 1 3/4 pounds oranges, 4 to 5 medium
- 1 lemon, zest finely grated and juiced
- 6 cups water
- 3 pounds plus 12 ounces sugar
Special Equipment: 10 (8-ounce) canning jars with rings and lids, funnel, tongs, ladle, and 12-quart pot
Directions
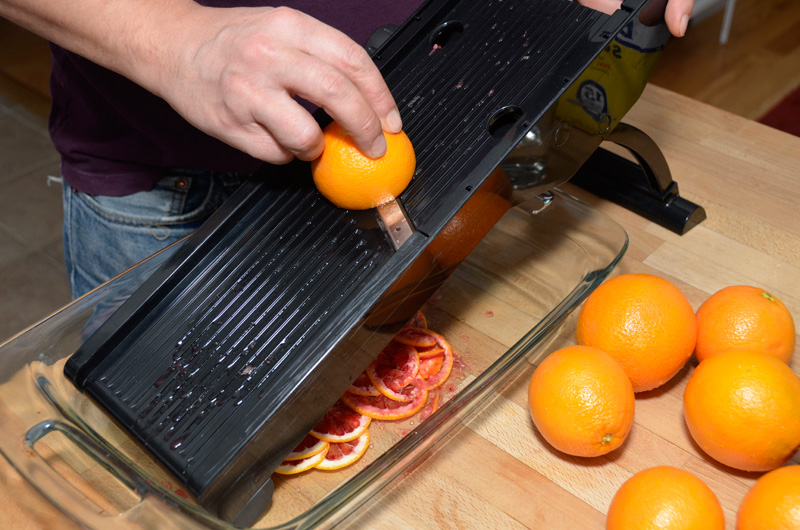
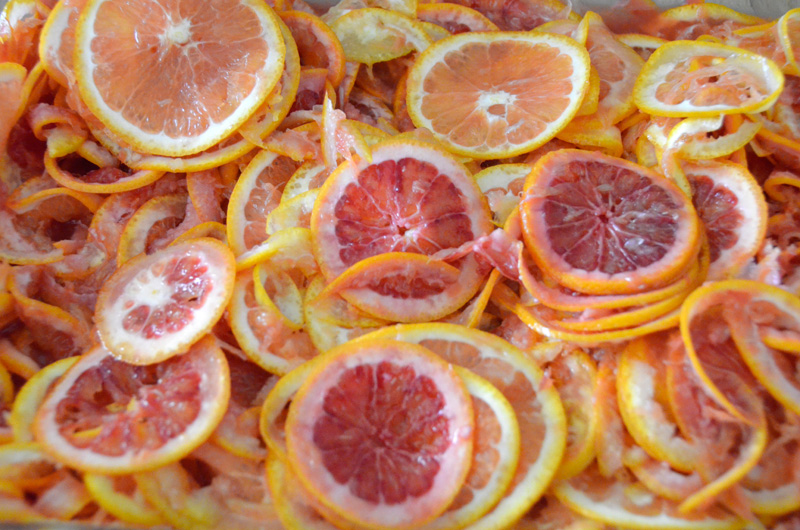
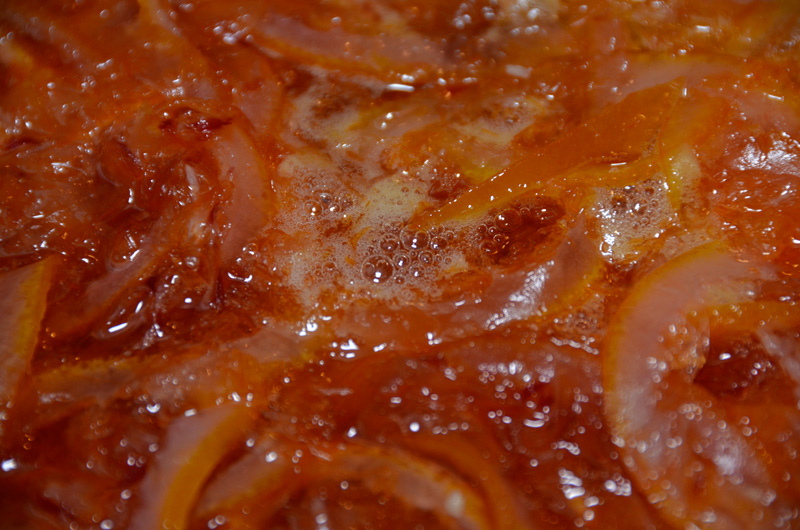
Wash the oranges and lemon thoroughly. Cut the oranges into 1/8-inch slices using a mandoline, removing the seeds as you go. Stack the orange slices and cut them into quarters. Place the oranges into an 8-quart stainless steel pot. Add the lemon zest and juice and the water to the pot, set over high heat and bring to a boil, approximately 10 minutes. Once boiling, reduce the heat to maintain a rapid simmer and cook, stirring frequently, for 40 minutes or until the fruit is very soft.
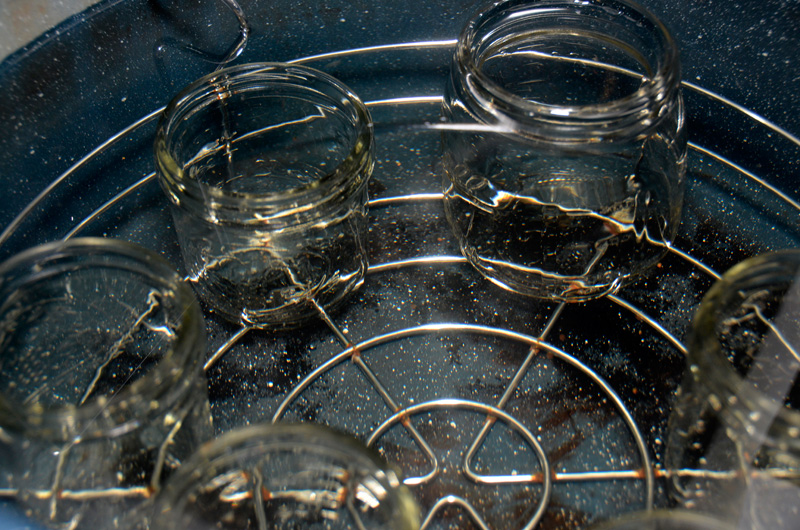
While the fruit is cooking, fill a large pot (at least 12-quart) 3/4 full with water, set over high heat and bring to a boil. Place 10 (8-ounce) jars and rings, canning funnel, ladle, and tongs into the boiling water and make sure the water covers the jars by at least an inch. Boil for 10 minutes. Turn off the heat, add the lids and leave everything in the pot until the marmalade is ready.
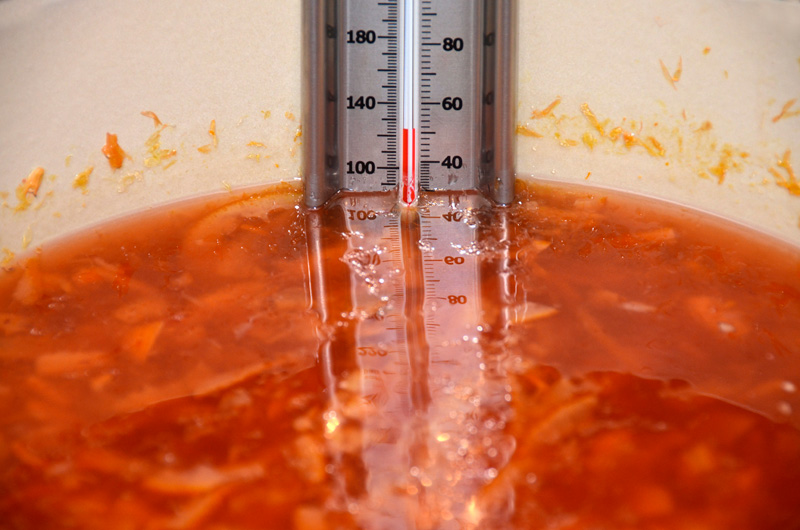
Meanwhile, place a small plate in the freezer. Increase the heat under the orange mixture to return to full boil. Add the sugar and stir the mixture continually, until it reaches 222 to 223 degrees F on a deep-fry or candy thermometer, and darkens in color, approximately 15 to 20 minutes. You may need to adjust the heat in order to prevent boil over. Test the readiness of the marmalade by placing a teaspoon of the mixture onto the chilled plate and allowing it to sit for 30 seconds. Tilt the plate. The mixture should be a soft gel that moves slightly. If mixture is thin and runs easily, it is not ready.
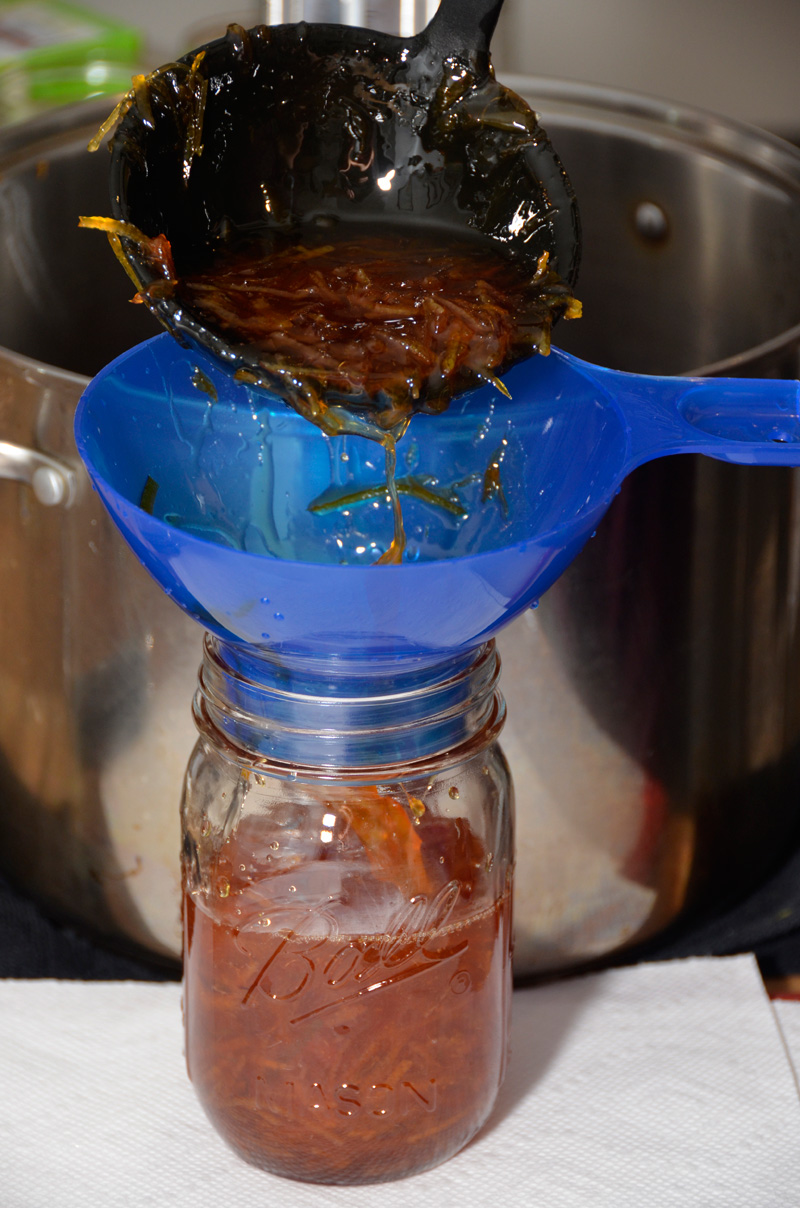
Remove jars from the water and drain on a clean towel. Place a canning funnel onto the top of 1 of the jars and ladle in the marmalade just to below the bottom of the threads of the jar. Repeat until all of the mixture has been used. The amount of marmalade may vary by 1 to 2 jars. Wipe the rims and threads of the jars with a moist paper towel and top each with a lid. Place a ring on each jar and tighten.
Return the jars to the pot with boiling water, being certain that they don’t touch the bottom of the pot or each other. (If you don’t have a jar rack, try a round cake rack, or metal mesh basket. Even a folded kitchen towel on the pot bottom will do in a pinch.) Add additional water if necessary to cover the jars by at least an inch. Boil for 10 minutes. Using canning tongs, carefully remove the jars from the water, place in a cool dry place and allow to sit at room temperature for at least 24 hours before opening. Once open, store in the refrigerator. Unopened marmalade will last for up to 6 months.
Seville Orange Marmalade by Elise Bauer
Ingredients
- 3 lbs of Seville or bitter oranges (about 12 oranges)
- 4 cups water
- 2 lemons – 1 regular lemon and 1 Meyer lemon
- 4 to 5 cups white granulated sugar
Equipment needed
- 1 wide 5 or 6-quart pan (stainless steel or copper with stainless steel lining, not aluminum which will leach, hard anodized is okay)
- An electric or mechanical juicer (you can juice all the oranges by hand but it is much easier and less time consuming with a juicer).
- A sharp chef’s knife
- A candy thermometer
- A large (8 cup) measuring cup pourer
- 5 to 6 8-oz canning jars
- Potato peeler
- A muslin jelly bag (for the pectin), or a large (18″ diameter) round piece of muslin, or several pieces of cheesecloth that you can tie up into a bag
Method
Preparing the fruit
1 Scrub the oranges clean. Discard any that are damaged or moldy.
2 Cut the oranges in half and juice them, one by one, until you have 2 cups of juice. Set aside the juice. As you juice the oranges, also save the seeds and the membranes – put them in a separate bowl and set them aside. The seeds and membranes will be used for making pectin.
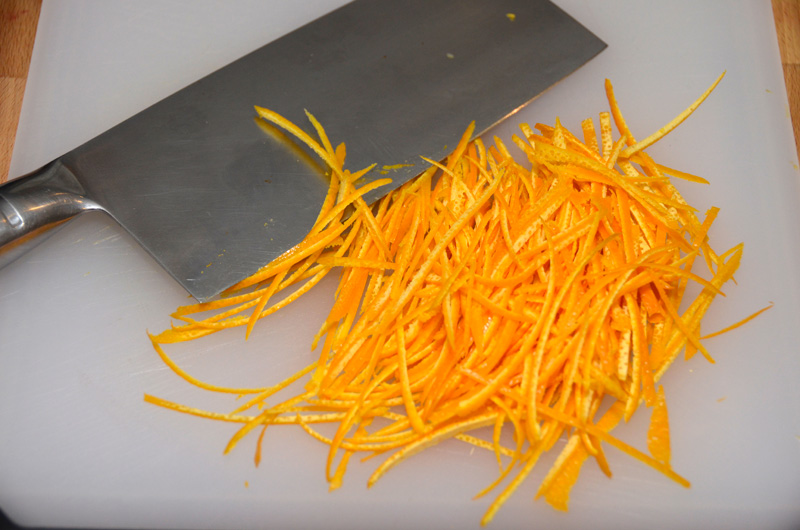
3 Taking a clean juiced orange half rind, use a spoon to dig out as much of the white pith as you can. The pith is bitter, so the more you can get out the better. But don’t worry if you can’t get it all out. What is pictured is the end result of one of my scrapings. It’s okay if there is still some pith. Use a sharp chef’s knife to thinly julienne the peel. Once you julienne all of the oranges that you juiced to make 2 cups of juice, you should have about 4 cups of peel. Set these julienned peels aside.
4 Juice the regular lemon and add this juice to the orange juice. Save the seeds for making pectin. Cut the Meyer lemon in eigths, lengthwise. Remove the seeds and as much of the inner membranes as you can easily remove. Cut the lemon segments crosswise into triangular pieces. (See the steps in the Meyer lemon marmalade recipe for photo descriptions.) Add the Meyer lemon seeds and membranes to the Seville orange seeds and membranes.
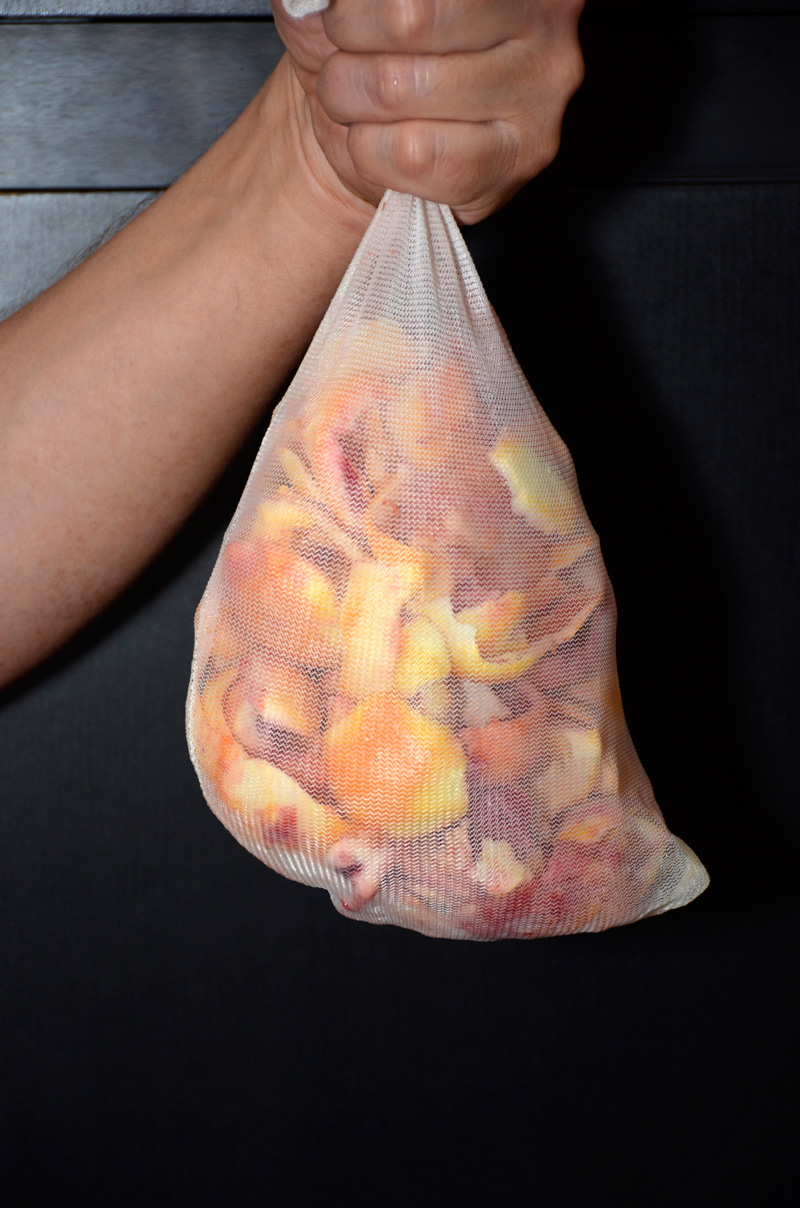
5 Put all of the citrus seeds and membranes into 4 layers of cheesecloth, tied up tightly with string, or into a muslin jelly bag.
First stage of cooking
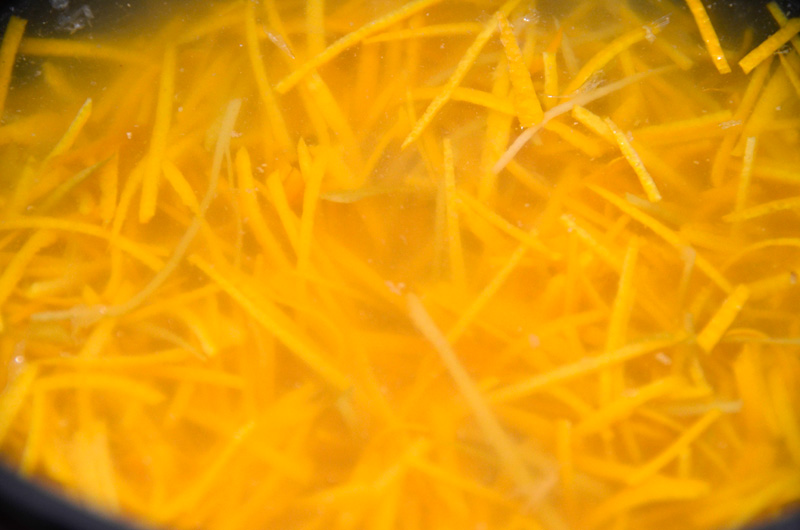
1 Place the orange and lemon juices into a large thick-bottomed pot, either 5 or 6-quart. Add the julienned orange peels and Meyer lemon pieces and the water.
2 Place the cheesecloth or muslin bag containing the citrus seeds and pulp into the pot and secure the string at the other end to the pot handle. As the mixture cooks, the pectin from the seeds and membranes will be extracted into the mixture.
3 Bring mixture to a boil. Let boil, uncovered, for about 30 minutes, or until the peels are soft and cooked through. Remove from heat.
4 Remove the pectin bag and place it in a bowl to let cool until it is comfortable to touch.
Measure the fruit and add sugar and pectin
1 Pour out the mixture from the pot into a large measuring cup. Measure how much of the mixture you have. Depending on how hard of a boil and how long the cooking time, you could have anywhere from 4 to 5 cups. Return the mixture back to the pan.
2 Add to the mixture 7/8 cup of sugar for every cup of mixture. So, if you measured 4 cups of mixture, add in 3 1/2 cups of sugar. Once the sugar has dissolved, taste the mixture. Add more sugar depending on how sweet you want your marmalade to be. Note that the jelly mixture will reduce further, intensifying both the flavor and the sweetness of the jelly. I typically use 4 cups of sugar for every 4 cups of fruit mixture.
Once your pectin bag has cooled to the point you can handle it, squeeze it like play-doh to extract extra pectin. Grasp a tangerine size portion of the bag and squeeze, pulling the bag away from you with one hand as you hold firmly with the other hand. Work your way around the bag. “Milk” the pectin until you have released anywhere from 2 Tbsp to 4 Tbsp of pectin. It should take a few minutes. The pectin has the consistency of sour cream. Add it to the orange mixture.
Second stage of cooking
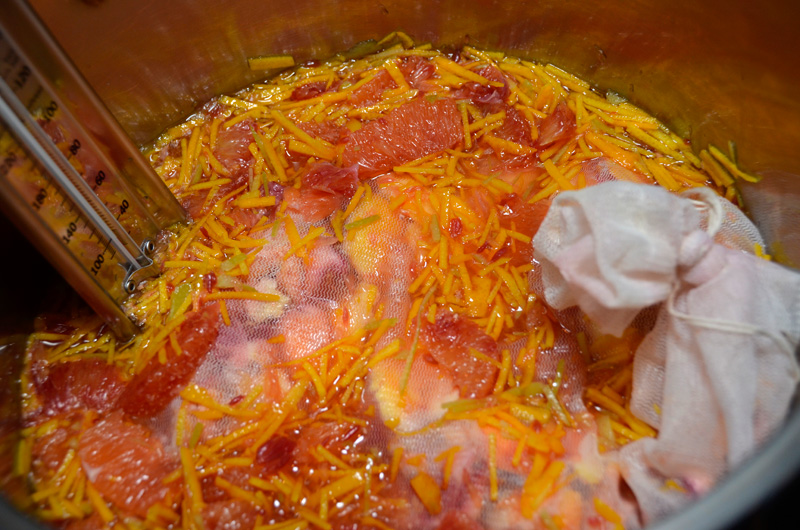
1 Heat the jelly mixture on medium high and bring it to a rapid boil, stirring occasionally, making sure nothing is sticking to the bottom of the pan. Secure a candy thermometer to the side of the pan. The marmalade may take anywhere from 15 to 30 minutes or so to set. After about 10 minutes, start checking it frequently.
2 There are two ways to test that the marmalade is ready to pour out into jars. One way is to check the thermometer for when the mixture reaches a temperature of 220-222°F (8-10°F above the boiling point at your altitude). Another way is to put a bit of it on a chilled plate and look for signs of it “wrinkling up” when you push it with your finger tip. Depending on how accurate your thermometer is, you might find the wrinkle test more reliable. Put several small plates into the freezer. As the jelly temperature exceeds 218°F, start testing it by placing a small amount of the hot jelly on a chilled plate. If the jelly spreads out and thins immediately, it isn’t ready. If it holds its shape a bit, that’s a good sign. Push up against it with your finger tip. If the jelly sample wrinkles at all, it is time to take the jelly off the heat and pour it out into jars.
When you use a candy thermometer to test the temperature of your mixture, make sure the probe is NOT touching the bottom of the pan. Make sure the indentation on the probe (with modern candy thermometers this is about an inch and a half from the bottom of the probe) is actually surrounded by the mixture. You may have to tilt the pan to one side, to cover the probe sufficiently to get a good reading.
I find the best jelly results from stopping the cooking as soon as the temp reaches 220° (I use a very accurate digital thermometer). At this point the test jelly is just barely wrinkling.
Overcooking a marmalade will result in a caramelized flavor or tough orange peels in your marmalade.
Canning
1 There are several ways to sterilize your jars for canning. You can run them through a short cycle on your dishwasher. You can place them in a large pot (12 quart) of water on top of a steaming rack (so they don’t touch the bottom of the pan), and bring the water to a boil for 10 minutes. Or you can rinse out the jars, dry them, and place them, without lids, in a 200°F oven for 10 minutes.
2 As the time approaches for the marmalade to be done, boil some water in a tea pot. Put the jar lids in a glass or ceramic bowl and pour the boiling water over them to sterilize.
3 Once the jelly has reached 220°F (or 8°F over the boiling temperature of water at your altitude) remove the jelly pot from the heat. Carefully ladle the jelly into the jars, one at a time, leaving 1/4 inch head space at the top of the jars for a vacuum seal. Wipe the rim clean with a clean, wet paper towel. Place the lid on the jar, securing with a jar ring. Work quickly.
If you want, you can process the jars in a hot water bath for 5 minutes to help get a better seal and to help prevent mold. If you used boiling water in an earlier step to sterilize the jars, you can just keep the same set-up for the water bath. You want to make sure there is a rack at the bottom of the pot so that the jars aren’t actually resting on the bottom of the pot.
4 Allow the jars to sit overnight. You will hear them make a popping sound as a vacuum seal is created.
No Comments